Over the following pages we will have a look at how data can be imported from Garage Master, but many of the principles are the same regardless of where the data comes from.
Please read through all the following sections as the common steps will not be reproduced:
Parts
Select ‘Administration->Import->Parts’ from the main menu and you will be asked if you want to make a backup of your database. This is highly recommended as if you make a mistake you will be able to easily restore the database.
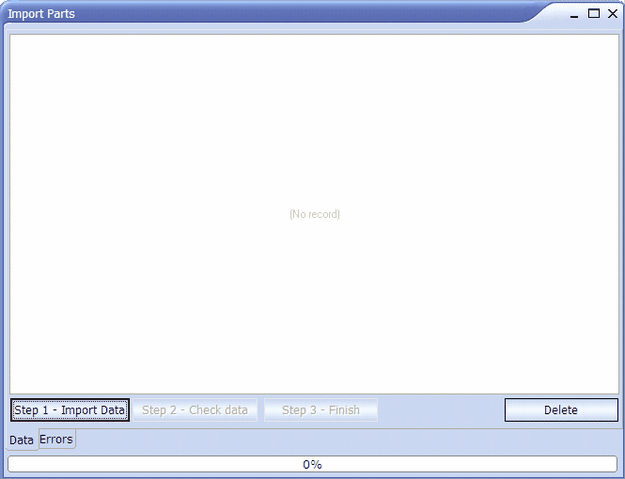
Once you have backed up your database you will see the following screen:
All data import is done in three steps, Import where you get the data from the external source, check where you check that the data makes sense and then the final step where we save the data into Onyx.
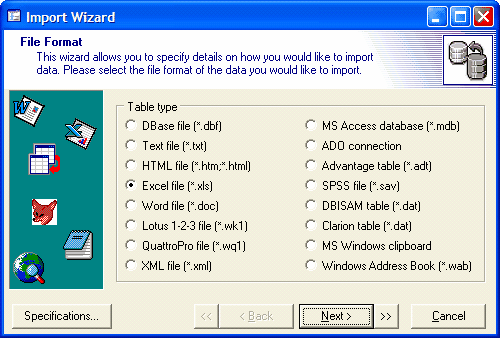
Pressing ‘Step 1 – Import Data’ will show the next screen
Here we can see the various different formats that we can import from, Garage Master uses Dbase so we will select that option and then press ‘Next’
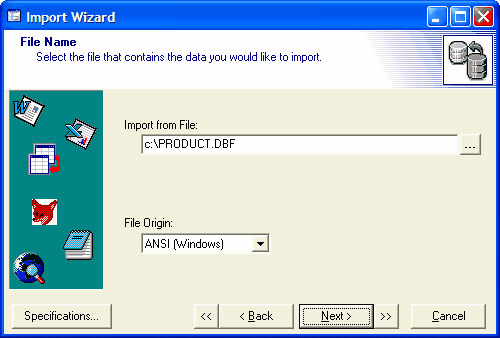
Here we have selected ‘Product.dbf’, press ‘Next’
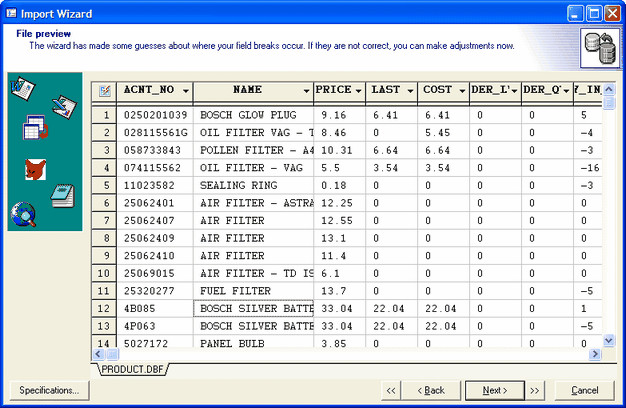
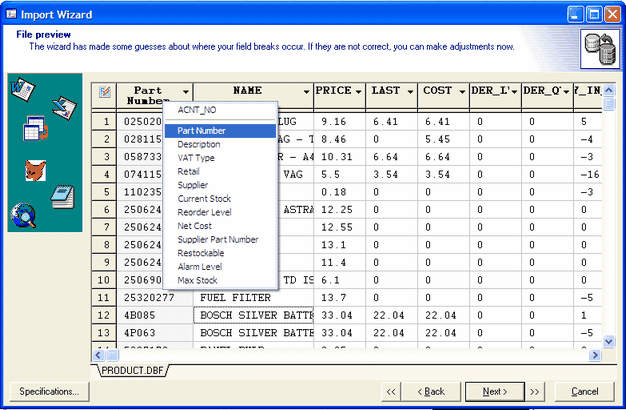
Now we are shown the first 20 lines of data from the selected file. Unfortunately the field names in Garage Master are not the same as in Onyx so we need to manually select the appropriate one by clicking on the headers and selecting which field to map to:
As you can see we have mapped the Garage Master field name ‘ACNT_NO’ to Onyx’s ‘Part Number’ field. We need to do this for the following fields:
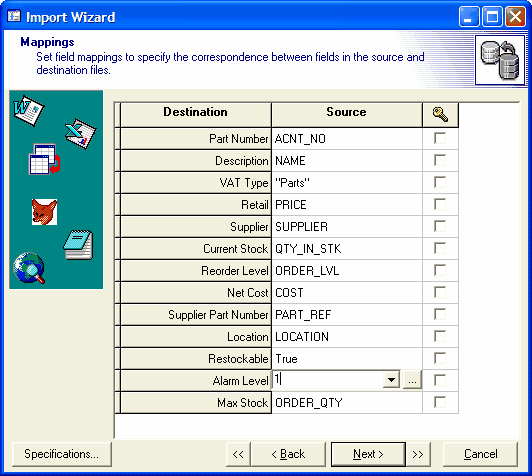
After selecting the fields we press ‘Next’ and we will be shown a summary of the mappings that we have made:
Garage Master does not have fields equivalent to Restockable, VAT Type, or Alarm Level so we can enter our own values here manually. We have elected to make all imported items Restockable, to have an alarm level of 1 and to add all parts into the ‘Parts’ VAT category. We can review and alter the imported data later on so this will not cause us any problems for now. Press ‘Next’
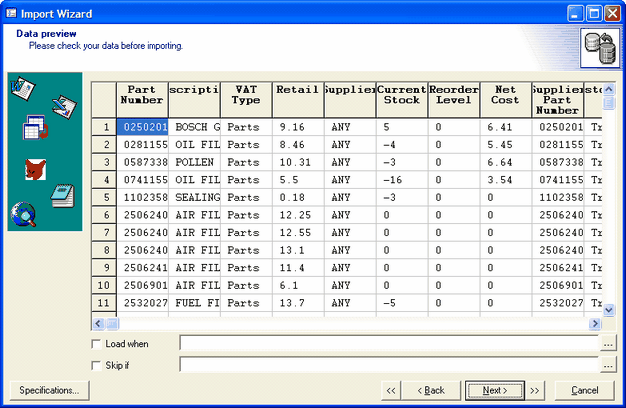
We now see a summary of the data as it will be imported, press ‘Next’
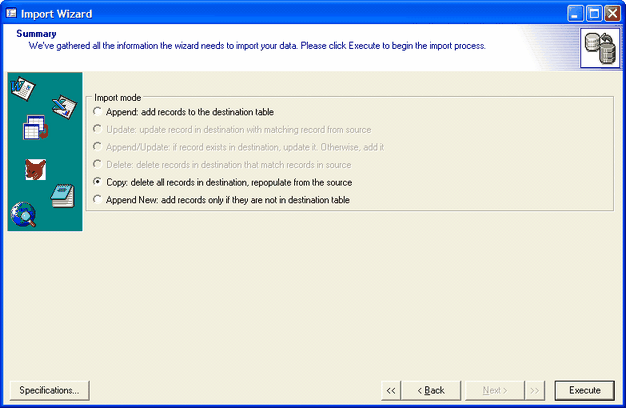
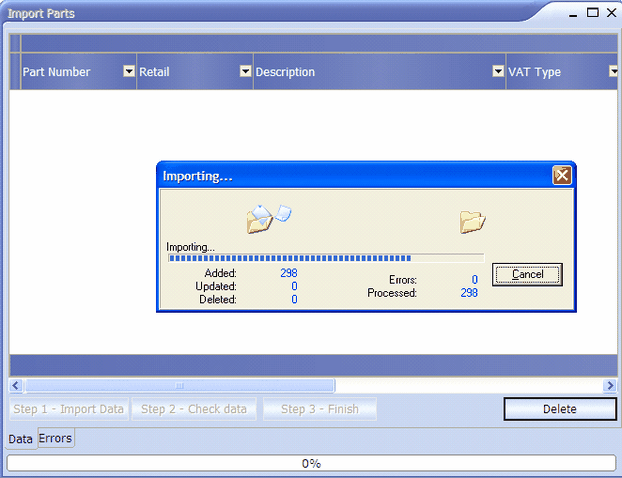
Now press ‘Execute’ and we will be able to watch the import progress
During the Import Process Onyx will look for a corresponding VAT Type and Parts Supplier, if it cannot find a match you will be asked to either select or create a new VAT Type or supplier as appropriate.
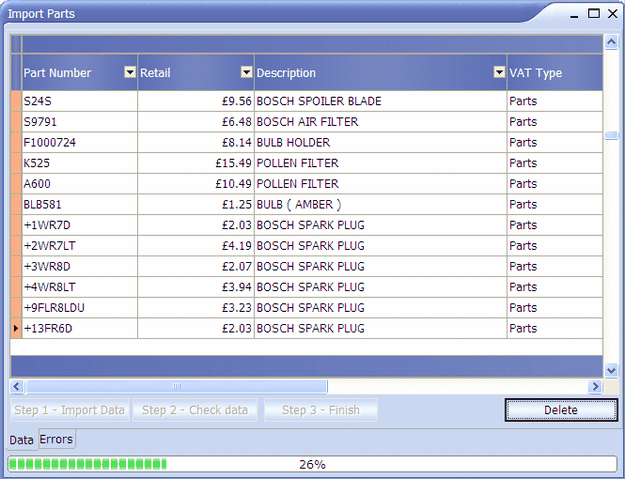
Immediately after the import is completed Onyx will cycle through the data and will produce errors or warnings as required. Once you have resolved any errors (you will need to correct the reported error and then press the ‘Step 2 – Check Data’ button until the ‘Step 3 – Finish’ button is enabled)
Now is a good time to review the data and make changes or delete entries as required, once you are happy press ‘Step 3 – Finish’
You will be asked the following question:
If you select ‘Yes’ then if Onyx finds a matching part in its own Inventory it will be updated with the data from the imported list, if you select ‘No’ onyx will skip the part in the import list.
We will select ‘Yes’
Here we can see the data import progressing, once finished we are asked if we want to save our data:
And that’s it, we have just imported all parts from Garage Master.
We could have used the Import Parts (Simple) option if we just wanted to import (or update) parts without affecting the stock management side, incidentally, this is a valuable feature if you regularly update your internal parts inventory via an excel spread sheet (from say an Exhaust manufacturer etc).
Customers
Please be sure to have read the previous sections before continuing as only the changes between importing parts and customers will be highlighted
Garage master keeps its customers stored in a file named “Customer.dbf”
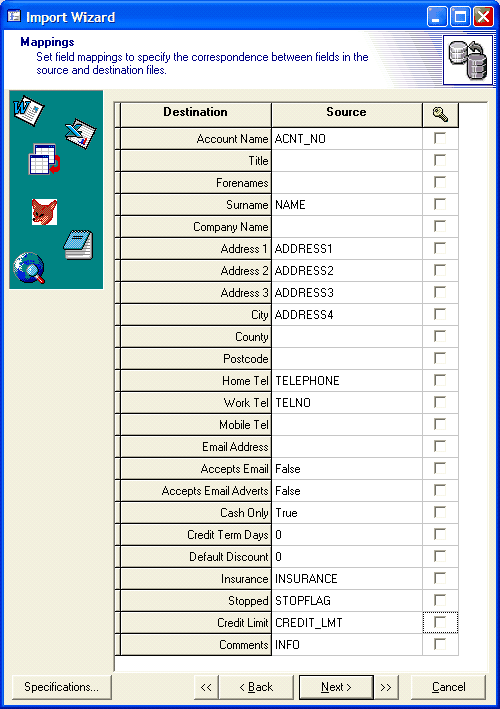
The field mappings should look like this:
Complete the steps (essentially just pressing ‘Next’ until you get to the end) and then press ‘Execute’ at which point you will see the import progress dialog. After which Onyx will check that it is happy with the imported data.
Unfortunately Garage Master stores names and addresses in an entirely different format to Onyx so it does make the next step somewhat more labour intensive. To correct this we need to separate the data into the correct format, this can be done directly in the grid but we have added the flowing feature to make the process somewhat quicker:
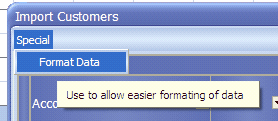
Page up through the imported list until you are at the first row and then select ‘Special->Format Data’ from the menu:
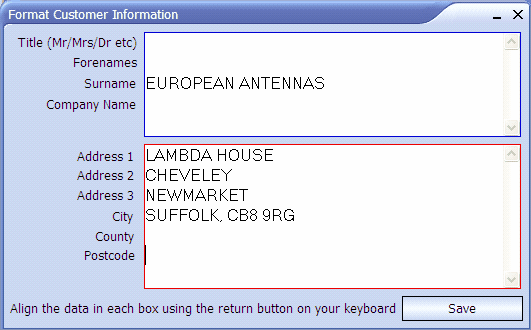
You will see a new screen pop up containing the data for the row that you are on:
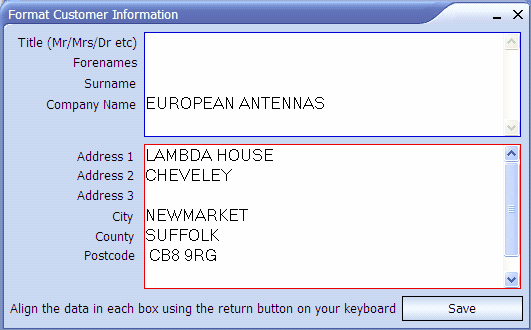
Position your cursor at the appropriate position and insert carriage returns (press enter on the keyboard) until the data is in the correct ‘shape’ i.e.
You will see that the appropriate data is aligned with the relevant label (Onyx will trim off any leading or trailing spaces automatically). Onyx will automatically proceed down the list until you reach the end or you close the screen without saving.
Once you have completed the process you need to press ‘Step 3 – Finish’ to save the data into Onyx.
Vehicles
Please be sure to have read the previous sections before continuing as only the changes between importing parts and vehicles will be highlighted
Garage master keeps its vehicles stored in a file named “Delivery.dbf”
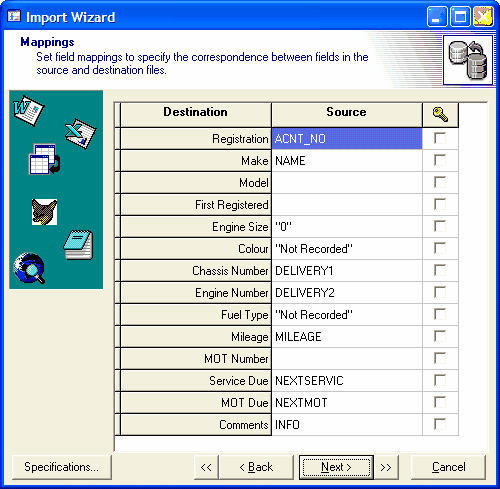
The field mappings should look like this:
Complete the steps (essentially just pressing ‘Next’ until you get to the end) and then press ‘Execute’ at which point you will see the import progress dialog. After which Onyx will check that it is happy with the imported data. You will receive a warning ‘Must Have Model’ which you can ignore for now.
Unfortunately Garage Master stores vehicles in a slightly different format to Onyx so it does make the next step slightly more labour intensive. To correct this we need to separate the data into the correct format, this can be done directly in the grid but we have added the flowing feature to make the process somewhat quicker:
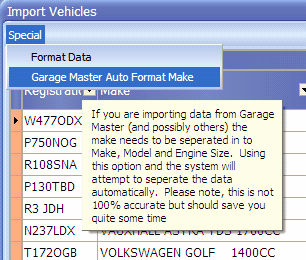
Select ‘Special->Garage Master Auto Format Make’ from the menu
Onyx will now cycle through all entries and separate out Makes and Models and (if possible) engine size. During the process if Onyx comes across a manufacturer or model that it does not recognise it will display a dialog where you can select from the available makes/modes or optionally add a new make/model. Onyx will also remember your answer to minimise user input. So for example, if you enter Volkswagen as VW in Garage Master, the first time that Onyx comes across a VW vehicle it will display the dialog where you can select ‘Volkswagen’ it will remember your answer and replace all other instances of VW with Volkswagen.
|
