If you prefer you can enter parts directly into the invoice grid.
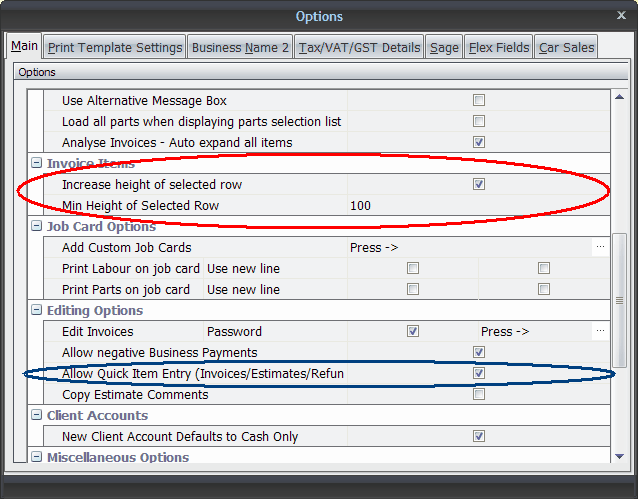
There are a number of user defined settings that can be set that control the way that Onyx adds parts, these settings can be seen in the Options screen:
As can be seen above there are three items that relate to invoice item entry:
Increase height of selected row: If checked Onyx will increase the height of the selected item allowing you to more easily see what you have typed in the description item:
Min Height of Selected Row: Use this setting to increase the height that Onyx sets the selected row to.
There is also the item labeled 'Allow Quick Item Entry', if this is checked then Onyx will add new parts and labour directly to the grid, from there you can directly edit the items, you can temporarily disable this feature by holding down the 'Shift' key while adding new items.
If you decide to allow quick item entry then you will notice that when you add a new item your cursor is located in the first column of the new item:
While your cursor is in this column you can enter the part number of the new item, if it is a part that has already been saved, then Onyx will fill in the rest of the columns for you, however, if you cannot remember the part number then pressing the button (shown with the magnifying glass) will display the parts selection screen where you can make your selection from the previously saved parts. Note, you don't have to enter a part number.
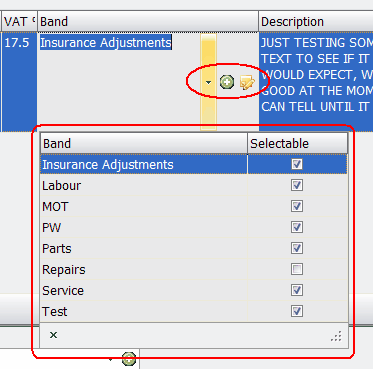
You can move along the columns by pressing 'Tab' or by using your mouse, most columns allow you to either enter new data directly (for example item cost) and some items have drop down lists for you to select from. If your cursor is in a drop down list then you can start to type your selection or you can press enter followed by 'Alt and Down arrow' to display the list. Most drop downs also allow you to enter new items by using the buttons shown in the drop down:
Here you can see that the 'Band' drop down is selected and shown in the dropped down state. There are three buttons, drop down, add new and select as default.
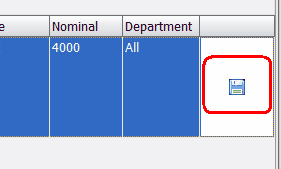
As you enter items Onyx will keep track of any changes that you make, if Onyx determines that it can save the new item to the Inventory (or you have changed a previously saved item) it will display a 'Save Button' as shown above, simply press this and your part will be save din the inventory (or the inventory will be updated if the item has been previously saved).
|


